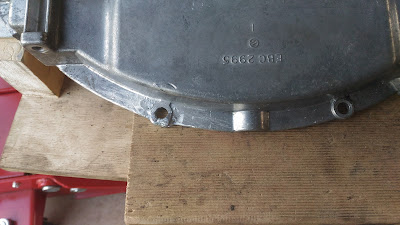
I finally got around to fabricating a new transmission dust cover. I cut up the TH400 and 4L60 dust covers and welded them together to make a buck to make a new fibreglass dust cover. Fits perfectly all that's left is to paint it.
2016
I replaced the 2.88 diff ratio with 3.58 and lived with the engine turning at 3000rpm on the highway for a couple of years. I had bought a 4L60e 3 years ago and had it built will all the good bits including a 5 pinion GM rear planet. This should easily handle 500hp.
The TH400 started to slip so it was time to pull the transmission and start the process of converting to the 4L60e. My first decision was which TCU to use, as I will be using a Megasquirt to run my new engine I decided to build a Megashift.
Transmission wiring harness made and ready to install
Megashift TCU installed under the drivers seat.
Need to get the car up high to get the transmission out. Here she sits nearly a meter off the ground.
Getting the old transmission out with out removing the engine requires a very long 1/2 drive extension.
TH400 out and ready for the bin, unless I can find someone who wants one to rebuild.
The dowel pins were frozen in the block, I tapped them and used a bolt to drive them out.
I have a 2.5" exhaust from the downpipes and wanted to keep it as high as possible, so I fabricated this transmission mount to clear the exhaust while using the original bolt mountings.
Grommet through the transmission tunnel for the wiring harness.
New 3" drive shaft 2kg lighter than the original.
Gear selector cable retaining bracket.
My car has Marelli ignition and this cover retains the engine speed sensor for the flywheel. Runs off the starter ring gear.
Repaired with HTS2000 aluminium brazing rods. This is the first time I have used them and they work quite well. Not pretty but it's strong.
It was lucky I decided to replace the transmission now, this flexplate would not have lasted much longer, these cracks are completely through .
New flexplate in the Mill ready to slot the Torque Converter mounting holes.
Finished machining and cleaned up read for installation.
Another view of the transmission mount. The design allows plenty of room for to get the 2.5" exhaust high.
Spade connectors from a cheap connector, these were the only ones I could find that would fit into the Jaguar main fuse box.
Main relay to power the TCU and Transmission.
This is the TCU mode select switch and has 3 positions Manual, Normal and Sport.
Nothing ever goes exactly to plan and as I did not have a simulator I needed to plug the TCU into the transmission to test all its functions. Well I TCU would not read the selector position switches or the load input signal (TPS).
Out with the TCU. Took me about 20 minutes to find ALL the zener diodes in these input circuits around the wrong way. Surely I could not have made such a simple mistake so I went back to the build instructions and sure enough the instruction said to put the Cathode (banded end) towards the heatsink, which is exactly as I installed them, so not my error but an error in the documentation, turned all the zeners around and VOILA I now have a working transmission.
These little buggers were the the wrong way around.
Ready for road testing and tuning
After about 20-30 runs up the road I now have the transmission shifting pretty good. Everything seems to work even kickdown. Lucky the road infront of my house is 100km/h so it allowed me to run at highway speeds.
I still have some fine tuning and to setup the second shift table but it seems pretty good as it is.


Are those 2.5" dual exhaust? Is that a bit large?
ReplyDelete